


-
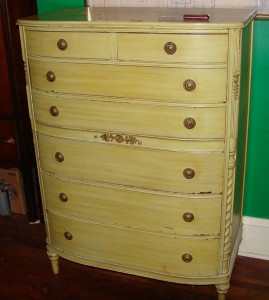
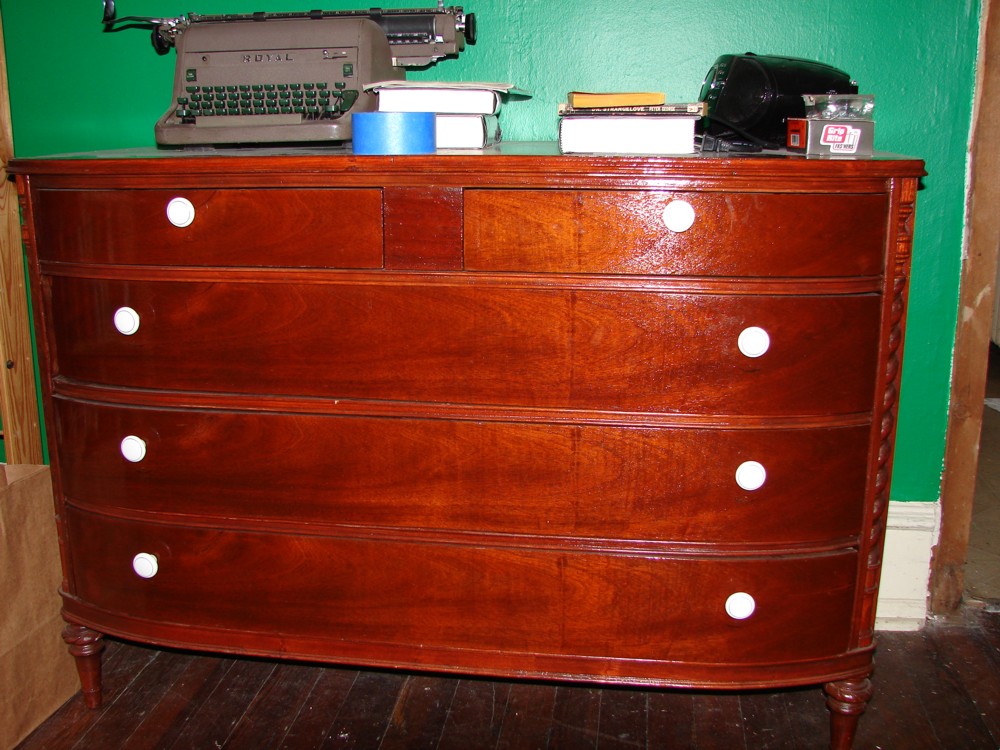
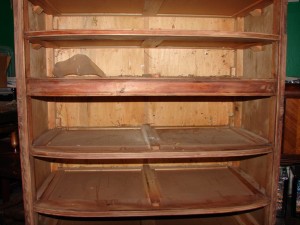
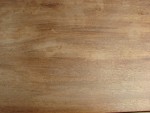
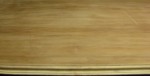
- The Original Piece
-
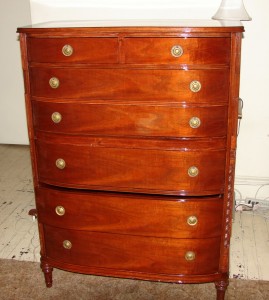
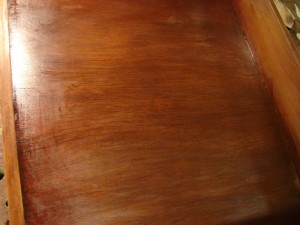
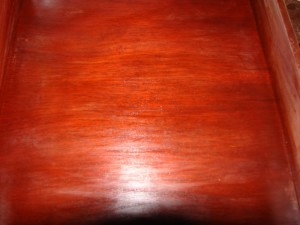
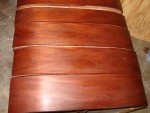
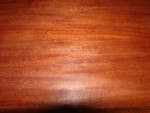
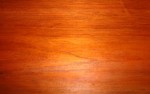
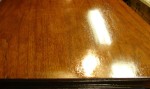
- The Finished Product
-
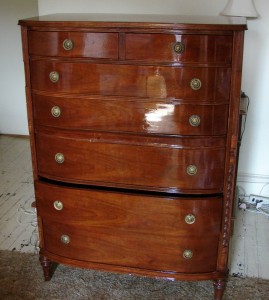
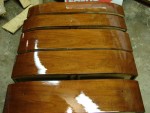
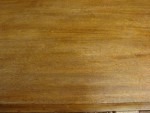
- The Finished Product, without flash
Equipment Used: 3M Safest Stripper, Denatured Alcohol, Stripping Pads, Steel Wool, Brass-Bristle Brushes, Dental Picks, Wood and Putty Chisels, Putty Scrapers, Methylene Chloride, Mineral Spirits, Minwax Gel Stain, Minwax Stainable Wood Filler
The Beginning
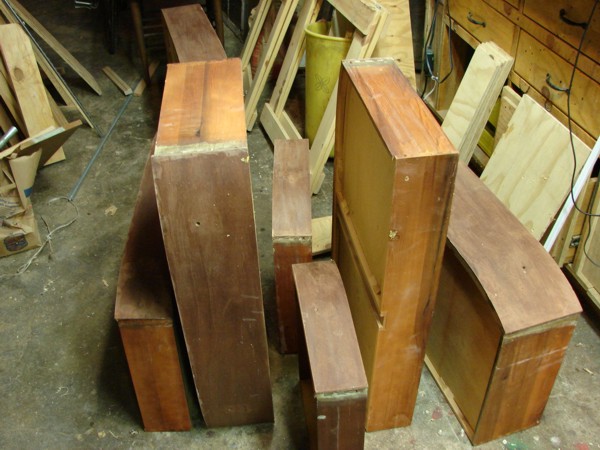
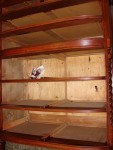
When I bought my house, in August of 1998, I found three matched pieces of furniture in different regions of the house. One was a large bureau, stored in the basement. The second was a bedside table (and I can’t recall where it was). The third was a large chest of drawers, about as high as my nipple, shoved in a back corner of the small second floor room we’ve been using for storage.
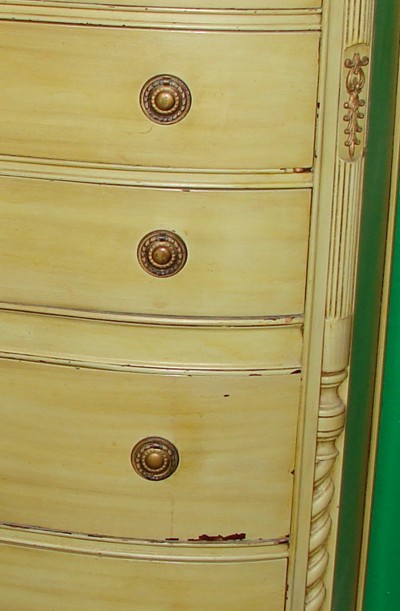
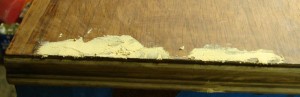
Detail of original chest
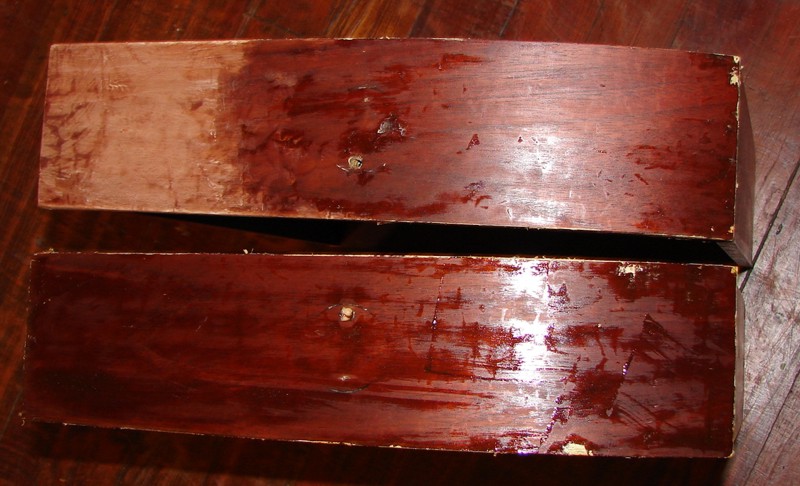
All three had been, in their past, painted with a truly horrible pale green paint. The photo at left is a closer look at the existing paint job: thick brush strokes, ugly texture. That’s what all three of these looked like.. The three pieces were old and worn-looking, and the bureau was missing several of its handles and its drawers slid in at weird angles. For a time, I used it as the stand for my table saw, and thought nothing of plunging the tip of a drill bit into the top on one project. One day, I decided to throw it out… but for some reason, I decided to try using Peel Away 6 paint stripper on it as an experiment. Turns out that, under the green paint, the bureau had a nice mahogany-veneer surface that looked terrific under the reddish sludge that had been the finish under the paint. (Further down this page, under “July 8th,” you’ll see a photo of what this looked like.) So I decided to try to refinish the bureau. It was in the basement already, and it seemed the most in need of repair. I didn’t have a camera then, which is why I didn’t document that refinishing job.
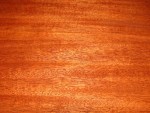
But here is the final product, so you’ll have an idea of how it turned out:
The Bureau, after restoration
In case you’re wondering, the stain was Minwax’s Sedona Red. When I did this to the bedside table, I used Minwax’s Mahogany, as a Gel Stain, which was easier to work with. That’s pretty much what I’m going to do to that chest of drawers over the next few weeks. (I have to apologize for some of these pictures. I really haven’t used a camera since a housemate stole my old Canon AE-1 about twenty years ago, and I’m still getting the hang of the adjustments I can make on this Sony unit I just picked up. And I’m working with existing light fixtures. The above picture glistens too much from the flash, but the grain pattern really pops: the flashless photo was accurate, but dull.)
Step 1, June 26: What’s the best stripping strategy?
If you’ll have a look at my other wood stripping page, you’ll see that my usual strategy is to use Peel Away 6 at first, and switch to methylene chloride for the detail work. You see, most of the wood in my house has a layer or two of latex paints on top, and under that is something that could be oil or even lead. The latex comes off in small sheets; the understuff comes off like thick toothpaste. There’s all sorts of wrong with this; the smell passes into the house, it’s messy, dangerous, and difficult, lots of cruddy waste, etc. But the paint on this furniture was a lot thinner, and there was a layer of finish under it. So I tried a heat gun: sometimes, that liquefies the finish, allowing the paint to come right off. This was the result:
Result of using a heat gun.
No good, obviously. For my next experiment, I took one of the top drawers down to the basement and applied a stripper that hadn’t given me very good results before: 3M’s Safest Stripper. I try this one every so often because, if it really was safe and non-fumey and cleans up clean and took the damn paint off, I’d switch to it in a heartbeat. But so far, it hasn’t stripped much paint for me, usually because of that multiple-layer issue described above.
 But the chest of drawers seemed to have only one layer of this paint, so maybe it was worth a try. I dabbled 3M Safest Stripper along the top of the front of a drawer, a spot which I could always sand down if any problems arose. The stuff is difficult to spread evenly and thickly, as the instructions specify, and I don’t think it’ll stick to vertical walls as well as 3M thinks it does. (It also looks like… nahh, let’s not say it. Let’s keep this page family-friendly.) I covered the strip with plastic wrap to keep it moist, and went away for a few hours. I came back and found, surprise surprise, Good Results.
 (You’ll notice that the colors don’t match in the two photos. My workshop uses fluorescents, which have a skewed color temperature, so I tried two different settings on the camera. Compensation for fluorescents, above left, was nice and warm. But the other, above right, showed the unpainted wood grain inside the drawer in a nice way, so I figured, let’s give you readers a comparison.) Notice that there’s a slight bubbling on the front, from a stray dollop of stripper. That’s what you should get when you use this stuff. Notice that the top of the drawer front is seemingly irregularly colored: that’s because there’s some finish there, and a spot or two where the 3M wasn’t thick enough to do much stripping. As I said, I’ve been disappointed by 3M’s Safest Stripper. But in this particular case (an actual case, really), it worked really well. So I’ll probably buy a new supply and use it here.
June 29
Took the first prep-step, and ordered two gallons of 3M Safest Stripper.
July 7: The Stripping Begins
Stripper on drawer front
Started applying the stripper to the drawer fronts (above) and the side of the carcase (below).
Stripper on side of carcase
Part of the general strategy is to let gravity help the stripper. So, I would be doing the carcase one side at a time, turning it over so that the side being stripped was flat, and the stripper could saturate the paint. So why start with the side? Why didn’t I start with the top of the carcase? Two reasons. The first was that I still thought of this as an experiment with Safest Stripper, and I’d rather have a half-assed strip job on a obscurable side than the highly-visible top. The second was that, since I’d be turning and flipping the carcase on all sides, I wanted to leave the paint on the top to protect it during this process. The wrinkles you see in these photos are, for the most part, from the stripper, within an hour or two of application. Safest Stripper may not be the most powerful, but it acts surprisingly quickly, and you can see that the paint has started to come up from the wood.
A few words about applying Safest Stripper
Fact is, the stuff has the texture and consistency of thin custard, and it doesn’t apply with a brush as evenly as one might like. Notice the unevenness under the plastic wrap. I’m tempted to dilute it with water (it’s water-based) and see if I can pump-spray it for economy and evenness. (It may mean giving it more time to strip– not a big problem, IMHO.) If anyone out there’s tried it, let me know if it’s worth the effort. As for its safety and comfort, I have to admit, 3M’s right. There are no fumes, and when I got some on my hand it didn’t burn at all. (Methylene Chloride, on the other hand, feels like a cigarette burn.) However, there is a slight smell of stripper (it’s vaguely mintlike), and my throat feels a little raw at the very back. I will try to put a fan in the window and blow these extremely vague fumes out of the house. But this is a LOT less intensive than the fumes I’ve had with other strippers, including the relatively contained Peel-Away 6. (Note added much later: That throat-rawness only occurred the one time. Otherwise, Safest Stripper was undetectable.)
July 8: First Stripping of the Drawers
Drawer Front Strip #1
This morning, roughly 12 hours after I coated the drawers with stripper, I started to scrape off the paint. Here are two photos of the two top drawers, taken from slightly different angles. (No, they don’t work as a stereoptic image.) The lighter area in the upper left is an area I tried stripping and sanding earlier during my initial test. I hope I can make that area match the rest of the drawer, but it’s likely that I’ll do that at the sanding-and-finishing stage.
Drawer Front Strip #2
As you see, after taking the paint off, there’s a layer of shellac that liquefies. That’s a huge help, since the shellac kept the paint from embedding in the pores of the wood. But once you pull the paint and stripper off, it starts to turn solid again. Right now, I have three strategies for getting that cleaned off. The easiest, cleanest method is to use a paint thinner of some sort– thinner, denatured alcohol, whichever works– and use it to dissolve the shellac residue. That doesn’t always work completely effectively, and usually requires a lot of scrubbing. Method 2 is basically letting it dry, and sanding it away. The third method would be to use a very thin application of methylene chloride to re-liquefy the shellac, scrape it off with steel wool, and then wash that clean with alcohol.
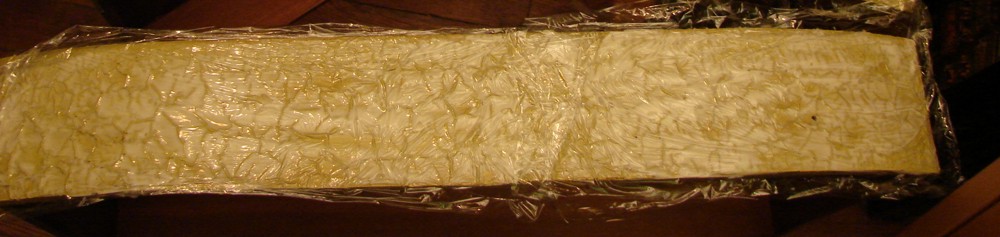
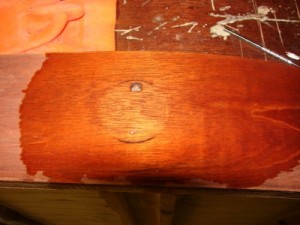
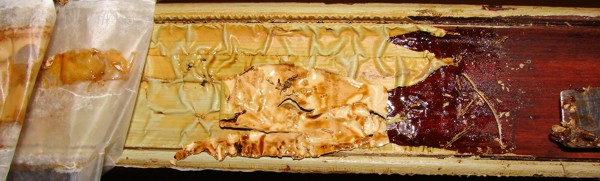
July 8, Continued: The Most Important Photo On This Page
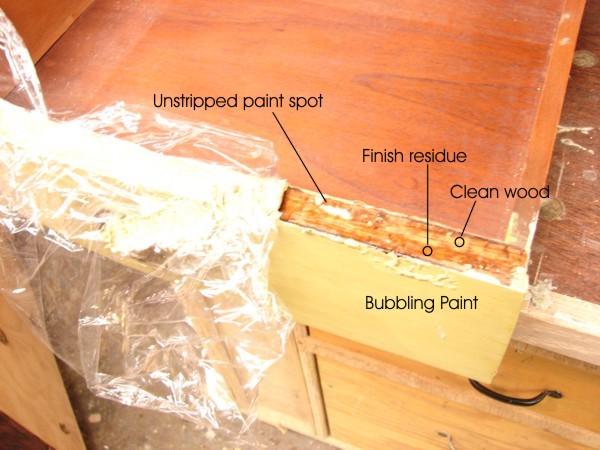
I decided to cart the drawers out to my front porch and take advantage of the open air. I decided to remove the stripper, and then wash the drawer fronts with stripping pads soaked in denatured alcohol while the stripper-shellac sludge was still liquid.
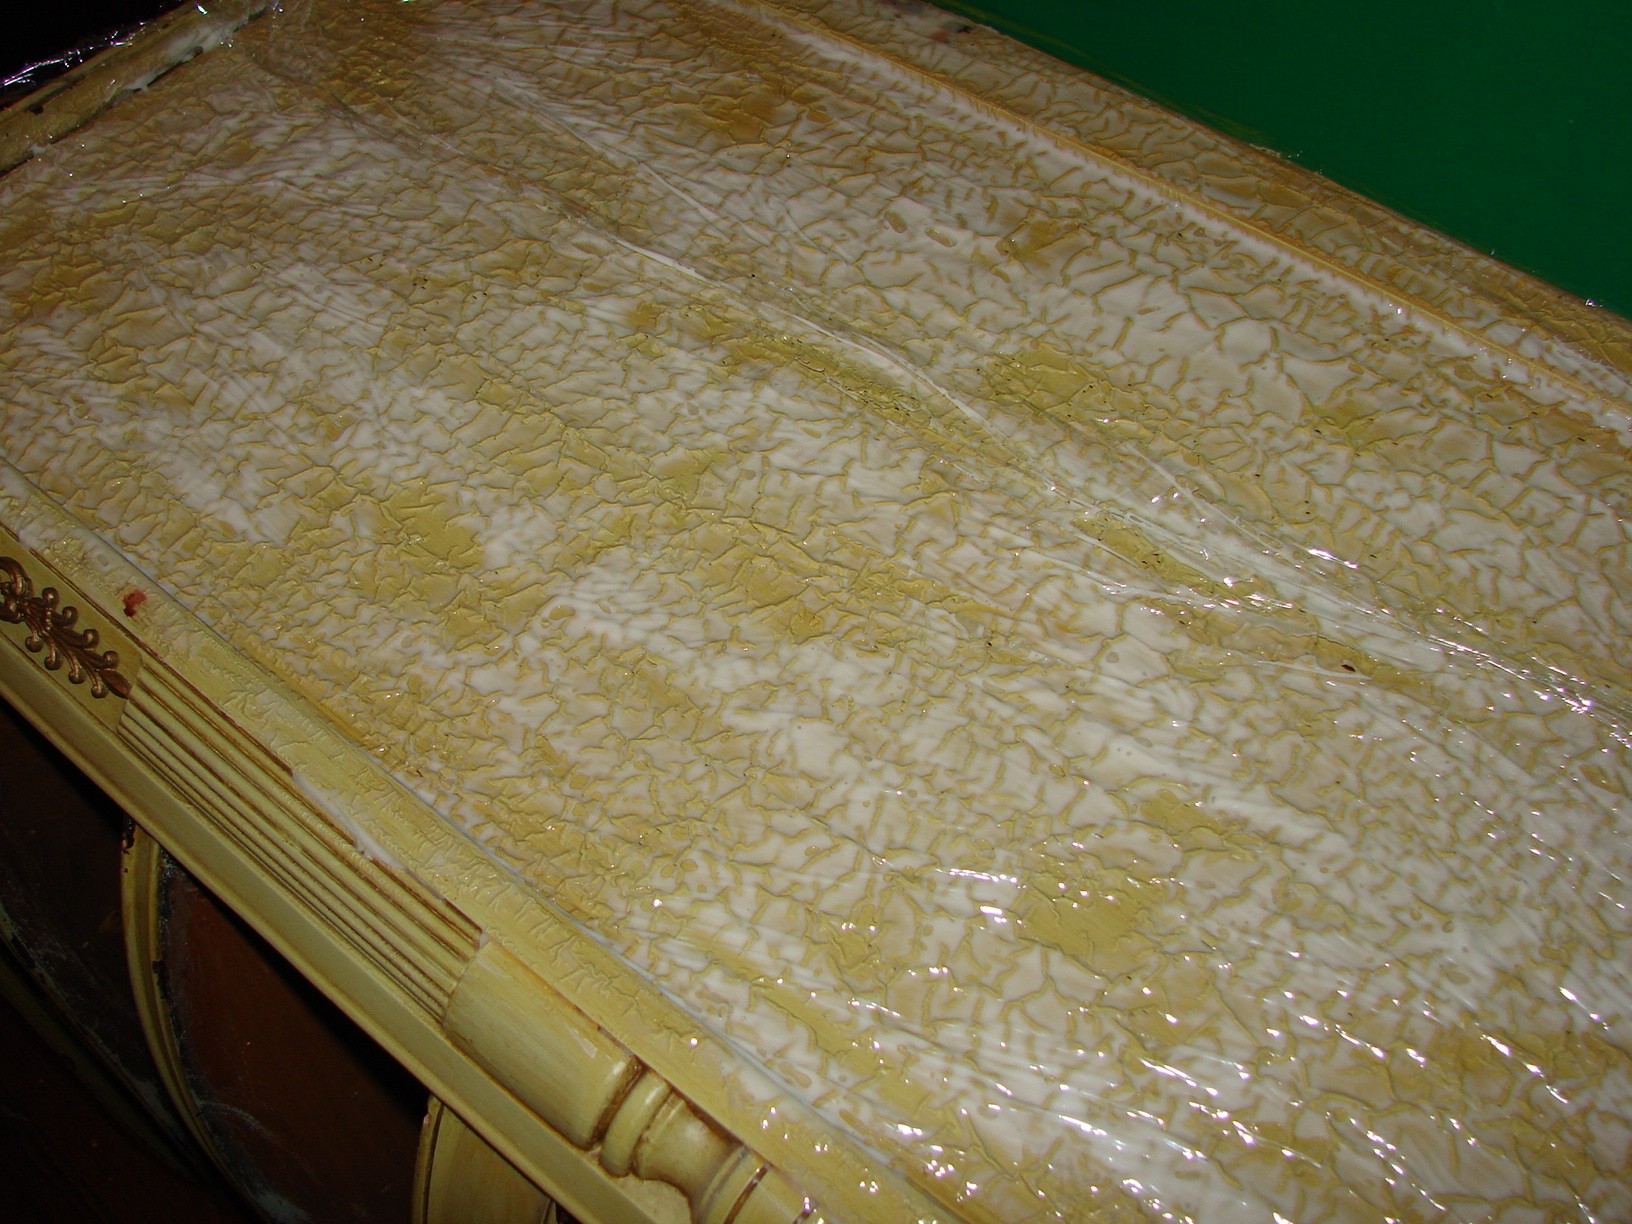
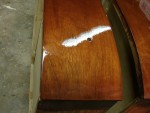
Here’s a close-up of one of the drawers as I was stripping it. It’s a very important photo. Go ahead, click on it: you’ll see what you’re in for when you’re inspired by this web page to try it yourself. I’m rolling back the plastic wrap, trying to do so in a way that keeps the sticky-paint crap under wraps, so to speak. Notice that the paint separates from the wood mainly because of the shellac. Also notice that you still need to use a scraper or thin chisel to remove a lot of this stuff. Notice whatever you want (maybe even the face of Lincoln in the warps and crusts of chemicals); this close-up photo should give you an extremely vivid and accurate sense of this job. But still, it’s worth it. The photo below shows what happens once you’ve washed and wiped that drawer front down with denatured alcohol. There’s still a few bits of unstripped paint on the upper right, and a crescent of paint in a nick made by the drawer hardware. Click on the photo and examine the surface carefully. You may see a faint light pattern that looks vaguely like alligator skin: that’s more or less due to the way the stripper separated the paint from the wood (compare to the photo from July 7, above.) I do not know if this pattern can be camouflaged with stain, which seems the most likely to me, or if I’ll need to perform some bleaching or sanding. But this is the second most important photo on this page: the first indication that the final product might look really, really good.
A stripped drawer front.
Right now, the drawers have a second coating of stripper and plastic wrap on the patches were the paint remained, and I’ll probably finish those tomorrow.
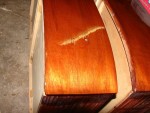
July 17: Bad News
During the week since I cleaned the drawer fronts, I also took the paint off of the side, and went over those patches on the drawers. There were patches that didn’t strip properly, so I applied a second patch of stripper. And that’s where things developed a problem.
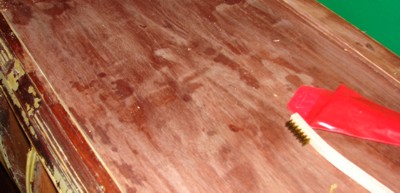
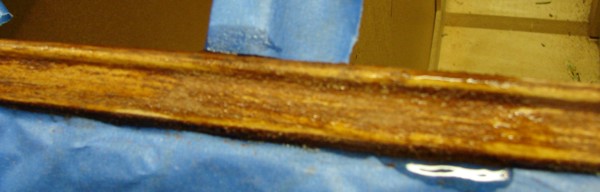
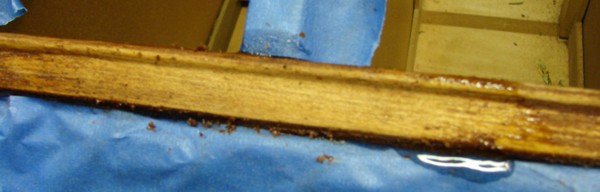
The photo at left shows a degree of blotchiness that turned up, in glaring, flash-lit relief. Between some of the stripper dying on the surface, the unevenness of stripping only splotches, and the like, the wood looks like this. And yeah, that gorgeous strip-job on the drawers you saw above ain’t as perfect no more. However, when I pour denatured alcohol over it to try to clean it, the blotchiness disappears. (As I’ve said, this makes the wood look as though it was finished.) So, while I may have to clean the wood some more, I’m going to try applying a layer of methylene chloride first to see if that evens it out.
Part 2
July 17: Dentistry and Side Flutes
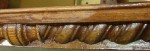
If you recall, the carcase had these decorative flutes up and down the front edges. So, after finishing with the side, I started on the flute on that edge. Here’s what the first pass of stripper did.
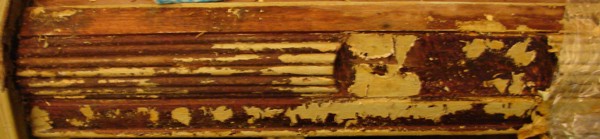

These are difficult areas to strip. On flat areas, a flat blade can take up a lot of paint at once. Here, the paint is trapped in any number of oddly-shaped nooks and crannies. The wood here is very porous, and it’s difficult to get the paint out without pulling up damp splinters. The spiral sections are apparently oak, which is nice, but a lot of the end-grain is exposed, and there’s a lot of finish and stuff that’s seeped in there. So what tools work best? I’ve found that, for the spiral areas, brass-bristle brushes with long bristles can scrub out the paint and finish residue, although I’ll probably have to use methylene chloride for a really thorough job. For the nooks and crannies, I use dental picks, which are required tools for paint stripping for one reason: their points can get bits of paint out of wood grain. You can buy dental picks at a lot of woodworking shows and even some online shops. There are three kinds. The first are straight picks, with the point bent at an angle. The second are these weird origami-shaped points, probably good for reaching between the back molars. The third are curved picks, where the point is bent into a question-mark shape. These curved picks are the ones you want to use: you can exert pressure without the pick’s handle twisting in your grip. And here’s the obligatory safety tip. Under no circumstances should you ever use these dental picks on your teeth, or any other part of your anatomy. Or anyone else’s for that matter. Don’t use them to clean teeth, clean fingernails, remove splinters, or inject Botox.
July 19: Side Flute Round 2
Cleaned up those side flutes some more. They’ll require some more work in some places, but they’re generally very clean for now.


July 21: The Other Side
I flipped the chest over, and began work on the flutes on the other side. No pictures are really necessary, since it’s pretty much what’s right above this paragraph.
But I have learned from a big mistake I made earlier. Previously, I stripped the side first, and then worked on the flutes. But while working on the flutes, I had to rest my tools on the surface I’d stripped– possibly damaging the exposed wood. This time, I did the flutes first, so when I rested the tools the paint was still there to protect the wood.
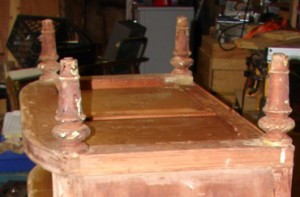
July 24: The Legs
 A brief recap. I’ve stripped the drawers and both sides. This leaves, unstripped, the front and top of the carcase. And the legs which, this afternoon, I’ve coated with stripper and wrapped with plastic wrap as shown in the photo at left.
Stripping the paint from the legs is going to be difficult because of all the curved and stuff. When you’re stripping a flat surface, you can pull off whole strips at once, like a snowplow clearing a nice, wide, flat road. But surfaces like the legs and flutes only let you take off little bits here and there. And the curves expose a lot of end grain, which absorbs a lot of paint and shellac. But I’ve used a lot of stripper here to try to loosen as much paint as possible. Once most of the paint’s off, I can take a handful of steel wool, or a 3m stripping pad, or even sawdust, wrap it around the leg with a tight grip, and clean it off with a twisting motorcycle-throttle motion.
July 24: Drawer Cleanup
 I’ve decided to take the drawers to the basement (right) and start on the sanding, staining and finishing. This kicks up a lot of dust, and I may have to use the stronger chemicals, so the basement’s best for this. Also, when I bring the carcase down there for its last round of stripping, sanding, staining, and finishing, the drawers will be finished and out of the way.
I don’t know if it’s evident in the photo of the drawers, but there are places where there is still some paint present– like the point where the dovetails attach the drawer fronts. I decided to clean this up with a Brute Force approach, namely, scrubbing it down with 40-grit sandpaper, which is like a rasp: it’s like sanding a board with a gravel road. Some of the edges got sanded down a leetle bit too much, but I kind of like the little bits of wear and tear to show.
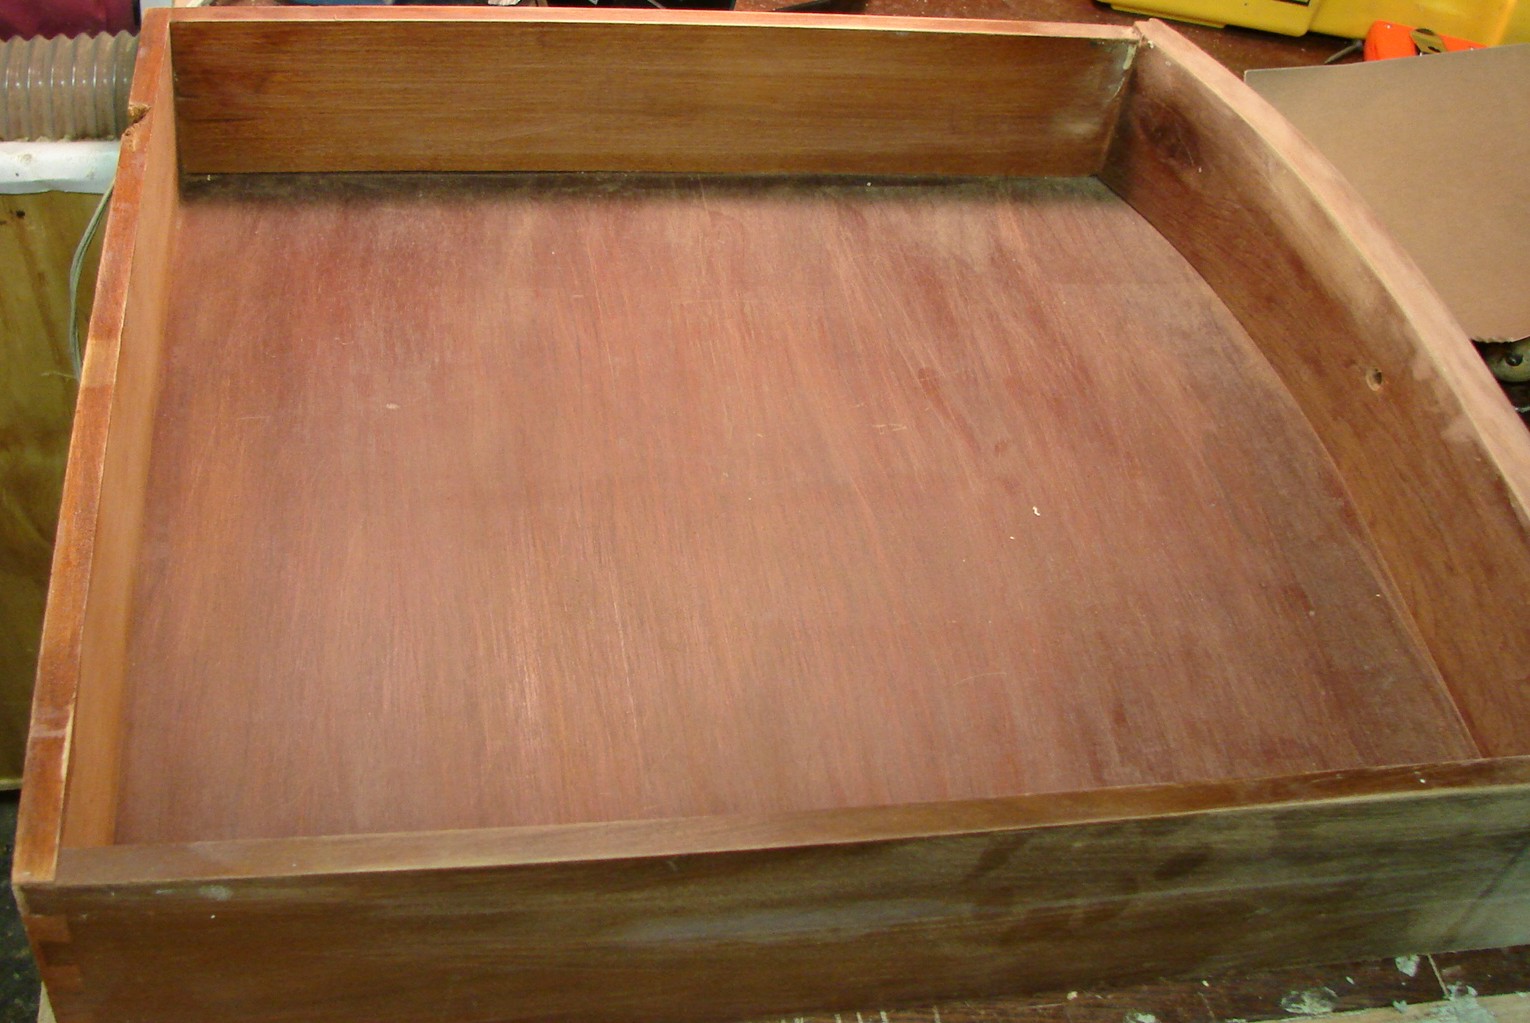
Drawer interior, dry
The interiors of the drawers were not finished, originally, but I’ve decided that I’m going to finish them with stain and polyurethane. So, I sanded off the occasional blotches with 100-grit sandpaper, followed with a pass of 220-grit sandpaper. (Note: The higher the number, the finer the grit.) I wasn’t really scrupulous about doing a really fine, even job because these were just drawer interiors, and all I wanted was a fairly even and smooth surface.
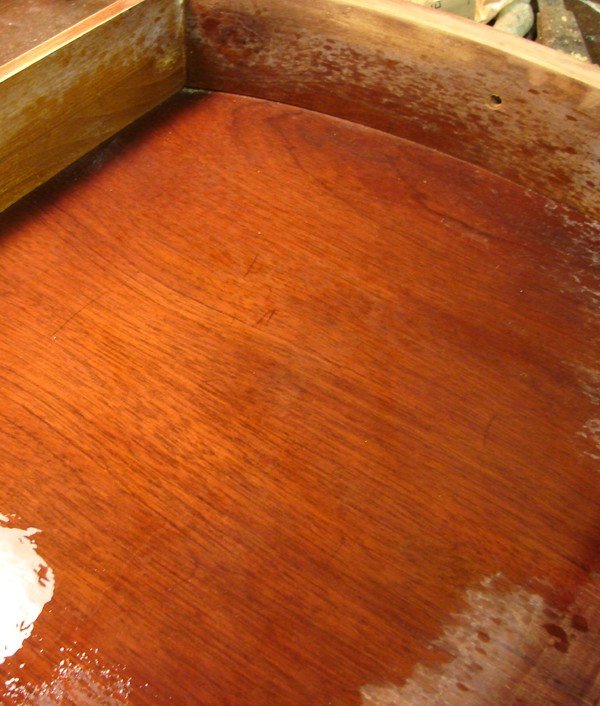
Drawer interior, wet
Here are two photos of a sanded drawer interior. The one on the left is the drawer, sanded, and dry… and the one on the right is the same drawer with a nice misting of denatured alcohol. This helps me wipe up the fine wood dust, but it also gives me an idea of what the surface will look like when there’s a nice finish on it. And the stuff evaporates in seconds.
As for the drawer fronts, I used a different procedure. First, I spritzed them with alcohol, because the tiny bits of paint still in the wood grain stand out, visually. Then I pick’em out with a fine dental pick– which, sadly, cause a tiny bit of grain damage. Then, I sand the drawer fronts carefully, and only with 220-grit paper, and very carefully in the direction of the wood grain. It ain’t absolutely perfect, not just because of remaining blotches, but the marks from the hardware are still in evidence. But that veneer is very, very thin, and if I sand it too much it’ll wear through. I like that lived-in stuff, and I’ll probably reuse the hardware anyway.
But thanks to alcohol, I can show you a wet-and-dry comparison. (Oh, the use of the camera’s flash seems to give it a slightly orangey tone.)
-
- Drawer front, wet
-
- Drawer front, dry
As of this writing (July 24), I’ve cleaned up three drawers, and will do the rest later in the week.
July 26: Three Wide Pictures
This evening, I finished the sanding of the drawer parts. There were a few new items to address, and here they are.
 This is a close-up of two bits of trim that were on the sides of the chest’s carcase, at the bottom of the frame. I had to remove these to strip them. I also left the nails in, so I could replace them really, really exactly when they’re done.
The second is a bit of paint on the inside of the drawer which I did not sand away. This was pretty old paint, and sanding it away would’ve been ugly, so I applied some of the most effective stripper around: methylene chloride. Just a little. But this close-up shows how this stuff is so effective. Notice that the paint has wrinkled up and the finish underneath has liquefied. It’s very effective, but it is extremely dangerous to work with.

Methylene Chloride, big
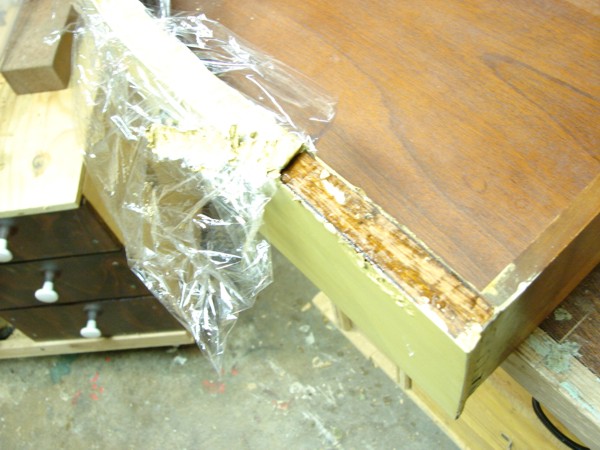
The final wide-shot photo is the edge of one of the lower drawers. (I’m surprised my camera can focus this close without a special macro lens.) As you see, the veneer is paper-thin, has chipped away, and has even begun to separate from the front of the drawer. The big chunk missing is, maybe, three-quarters of an inch wide.
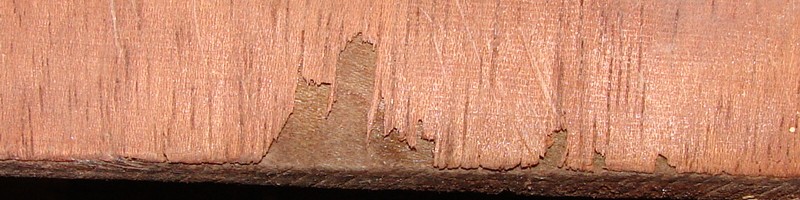
Torn Veneer on the top of the case
Now, if I were a professional furniture restorer, my job would be to remove the veneer in its entirety, and replace it with a nice, fresh, well-glued sheet. Well, I’m not, and since I’m not selling this piece, I’m perfectly willing to accept an imperfection or two (so I tell my friends that it’s called “character.” So I got some wood glue onto the point of a dental pick, and forced the goop under there to stabilize what veneer’s left. As for the missing area, the options I have available are either a) fill it with a very thin bit of wood putty that I’ll sand flush, or b) leave it missing. I’ll do b), because wood putty stains very dark.
July 26: Trying Out the Finish on a Drawer Interior
As I said earlier, I gave the drawer interiors a light sanding, and washed them clean with denatured alcohol. Funny thing is, when it dried, it left these large whitish patches on the wood. The photo at far left shows these areas fairly well. I didn’t think anything of it because, when they were wet, they looked fine.
But they also seemed a little smooth, like the remnant of an old clear finish. Which is pretty much that I think they are, because I tried a test application of gel stain on this particular drawer’s interior. And the stain did not seem to penetrate these regions, nor did it seem to stick to the surface.
So I gave it another round of sanding. I didn’t so an absolutely thorough job: I just wanted to see if scuffing this whitish surface enough would give the gel some purchase. It seemed to be effective, if not perfect: the second and third photos above (clickable) show the result. (Photo 2 uses a flash, Photo 3 doesn’t. In both, the stain is still wet.)
So here’s what I’m thinking right now. I’m thinking that the the drawer interiors have a layer of finish, and that sanding it doesn’t seem to really clean it out as well as I’d want. This will take a chemical stripper, and since Safest Stripper is sort of weak, I’m probably going to have to make a thin application of– Gasp! Choke! Methylene Chloride, and a quick scrub with fine steel wool.
But I’m going to put that off for later. Tomorrow, or Friday, I’ll clean off the legs, and maybe get started on the carcase front and top.
An Important Note about Gel Stain
The instructions say to apply the stain, wait three minutes, and then wipe it clean. This is absolutely true. Do not wait more than three minutes before wiping off the stain. Otherwise, it will solidify, and you’ll either have to sand it off or wash it off with paint thinner or something. Remember, all you need is enough stain to attach to the wood and make it look nice.
August 1
It’s the hottest day of the year, and I spent some of it with chemicals. I started on stripping the front of the carcase, for one thing. Below is a close-up of one of the cross-pieces as I stripped it. The tiny channels at the top and bottom were cleaned with a dental pick.
 And I decided to try applying a stain to the drawer fronts. The stain, in case you don’t recall, is Minwax’s Mahogany Gel Stain: you apply it, let it set a few minutes, and then wipe it off leaving a residue. It seemed to me that the best course was to stain and polyurethane the fronts of the drawers first. That way, they’re protected when I do the interiors. I laid the big drawers so I could eyeball the stains for uniformity. The photo at left is what the stain looks like when I apply it (like bad paint), and at right is a clickable image of what the stain looks like after I wiped it off. The stain needs 8-10 hours to dry, so I’ll go back, and try to even it out if I need to do so.
August 12: Lots of Finishing Work
Carcase front, stripped
The two weeks since my last update included a very severe heat wave, which didn’t make bending over a piece of furniture with nasty chemicals and protective clothing very appealing. But, work has progressed, a lot’s been accomplished, and I’d say that I’m in the home stretch. This project could be done by the end of next week.
The photo above shows the front of the carcase, now that I’ve stripped the front edges (a job I started on August 1). Notice that, in the back, are bits of stripped paint and other garbage that fell back there during the work. I’ll vacuum that stuff out before I’m done.
When I took that photo, my plan was to haul the thing into the basement for the final stripping and finishing. It was a while before I got someone to help me do the hauling (big thanks to Matt Van K for the heavy lifting), so I decided to get the drawers done.

And here they are… well, the fronts, anyway. As before, I’ve included photos both with and without a flash.
But what about the interiors of the drawers? What about alla that white crud I showed you on July 26? Well, I sanded the drawer interiors, stained them, and applied polyurethane, and they look generally Pretty Good, even if the polyurethane isn’t completely even…. but the photos I took weren’t terrific. Either they were too dark, or washed out. But photos will come, eventually.
Completing the Legs
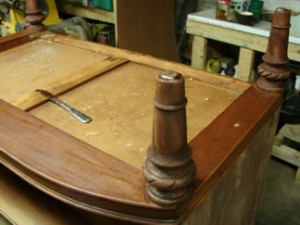
As you see, we got the carcase into the basement. Here’s a Before and After comparison. the legs were difficult to strip with Safest Stripper, so I kinds figured that I’d be using methylene chloride on them for a serious cleanup. At left, you see what I started with. At right, you see the legs with stain applied.
After this was done (August 11), I applied stain to the legs and to the boards around the edge of the bottom, and let the thing dry overnight.
August 12: Restripping the Side and the Flutes
This part of the job requires some memory-refreshment. As you may recall, the side flutes had lots of nooks and crannies and embedded paint, which required a once-over with methylene chloride before they were ready for a stain.

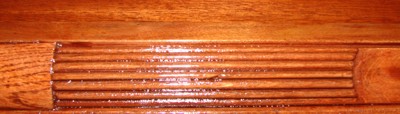

There’s a bit of stain in the corners, but I’m OK with that.
Earlier, when the side panels got blotchy, I’d said that I’d probably have to clean them up a little. I did, by applying a thin coat of methylene chloride and scraping it off. I also sanded it with a 320-grint sanding block.
The results, below, were pretty nice.
-
- Side, no stain
-
- Side, stained, no flash
-
- Side, stained, flash
-
- Side, stained and finished
August 13-15. Completing the Sides.
I spent these days getting the other side done.
Part 3
August 17. The Front of the Carcase
 As you can see in the photo on the right, I’ve stained the fronts of those shelflike sections of the carcase. These are where the drawers rest. The photo is a bit misleading, since I’ve actually laid it on its back on the floor so I could work with it more effectively. So this photo’s been rotated.
You may notice some blotchiness on the undersides of the sections. That’s fine for me: I’m only staining these so we don’t see unstained wood when the drawers are open. I’ll probably re-finished these a little before the final polyurethaning.
These dividers are also a problem because they’re just not the same kind of wood as the rest. I think they’re poplar: they have no real grain pattern, they’re very smooth, and they’re faintly greenish. Also, the gel stain doesn’t seem to “stick” as much as it does on the mahogany. I’m hoping to create a stain that’s darker than that of the drawers for a nice, heavy outline effect. (It occurs to me that a penetrating, water- or oil-based stain might’ve been better for poplar, but I’d rather not experiment with that at this stage.)
There are a few “problem” areas. The points where the sections meet the sides create these deep pockets in which the finish pooled. That big section in the middle has running beads on the top and bottom, and the thin groove is also where finish can pool up. And that smooth, vertical edge between the drawers and the side flutes? Well, they’re going to need extra attention.
My current plan is to let this first stain coat dry, see how it looks, and decide tomorrow whether to stain it again or to apply polyurethane. And this weekend? Strip, stain, and finish the top. Amazingly, this may have taken me less than a month.
August 18: Brian Screws Up
As you recall, I’d finished the flat areas beside the side flutes. But they’re just a bit too close to the fronts, and I had to reapply finish, and then I had to sand down the poly, and… well, I screwed up a little.
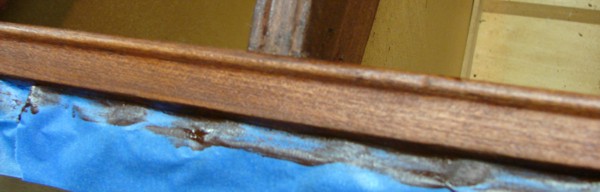
 Have a look at this close-up: I know the spiral area looks rough. Frankly, it’s a real bitch to sand in those nooks and crannies, and I don’t trust myself with a Dremel to do it really surgically proper, like. But it’s the flat area above that. Notice how the poly and the stain have eroded? My screwup. Right now, while the stain is drying, I’ve also applied blue painter’s tape over the side flutes, so I can keep those flat areas exposed… because I’m going to have to take them back down to the wood and restain them. Then, I will lay down some polyurethane over the full front of the carcase.
August 19: Brian Fixes Up his Screwup
The three photos below show the process I used to fix my mistake. First, I applied some methylene chloride. Then, after giving it a moment to bubble the stain and previous poly from the wood, I scraped at it with a wire bristle brush. Once I did that, I applied a layer of stain. On August 20, I applied polyurethane to the entire front of the carcase. The stain still looks irregular, but I kind of like the look. (I haven’t taken photos of this stage yet. It was too messy to bring the nice clean camera anywhere near the project.)
August 23-25: The Home Stretch
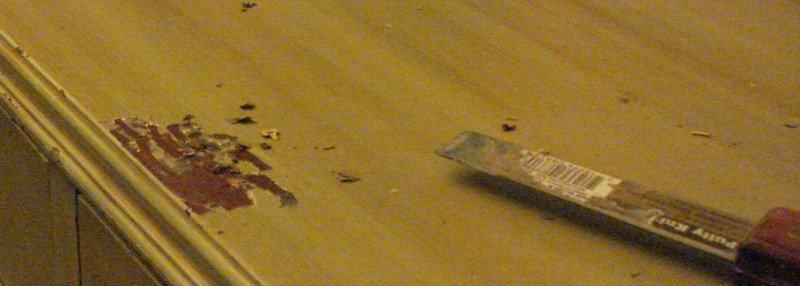
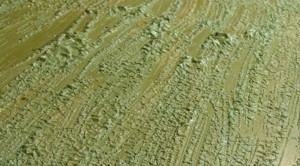
Now it was time to strip the top of the carcase. I decided that I’d use a liberal application of methylene chloride to take the paint off in one session, instead of using Safest Stripper and letting it sit overnight. The moonscape at right is what the methylene chloride did to the paint finish within thirty seconds of the application. Sure looks effective as hell, doesn’t it?
 WRONG. I made several screwups at this stage, none of which I care to document with photos. But all the methylene chloride accomplished was to separate the layer of green paint from a layer of off-white paint underneath. And the green paint came off in flecks, many of which– still with active methylenechloride on them– attached themselves to the side of the carcase. Which damaged the finish I’d thought I’d finished days before. So, after some wiping, sanding, some spot-refinishing, and some re-poly-ing, I got that side to look passable. But boy, was THAT a bad idea.
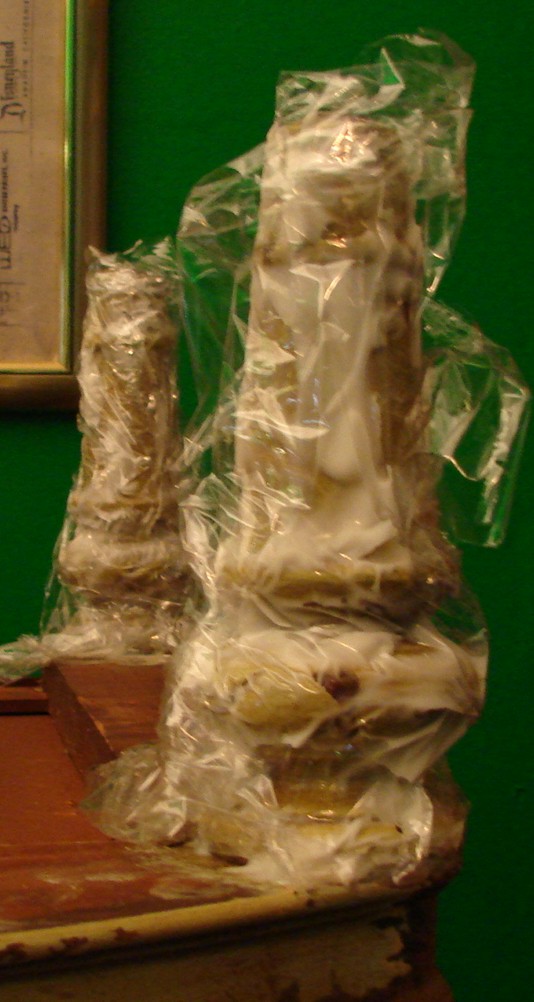
So, here’s what I finally did. I wrapped the carcase in plastic, taping it just under the top, to protect it from stray bits of stripper (or banging into it). Then, I covered the top with 3M Safest Stripper, which had been working just fine for me, and which I should’ve used right off the bat. Then I covered that with wax paper, and let it sit overnight.
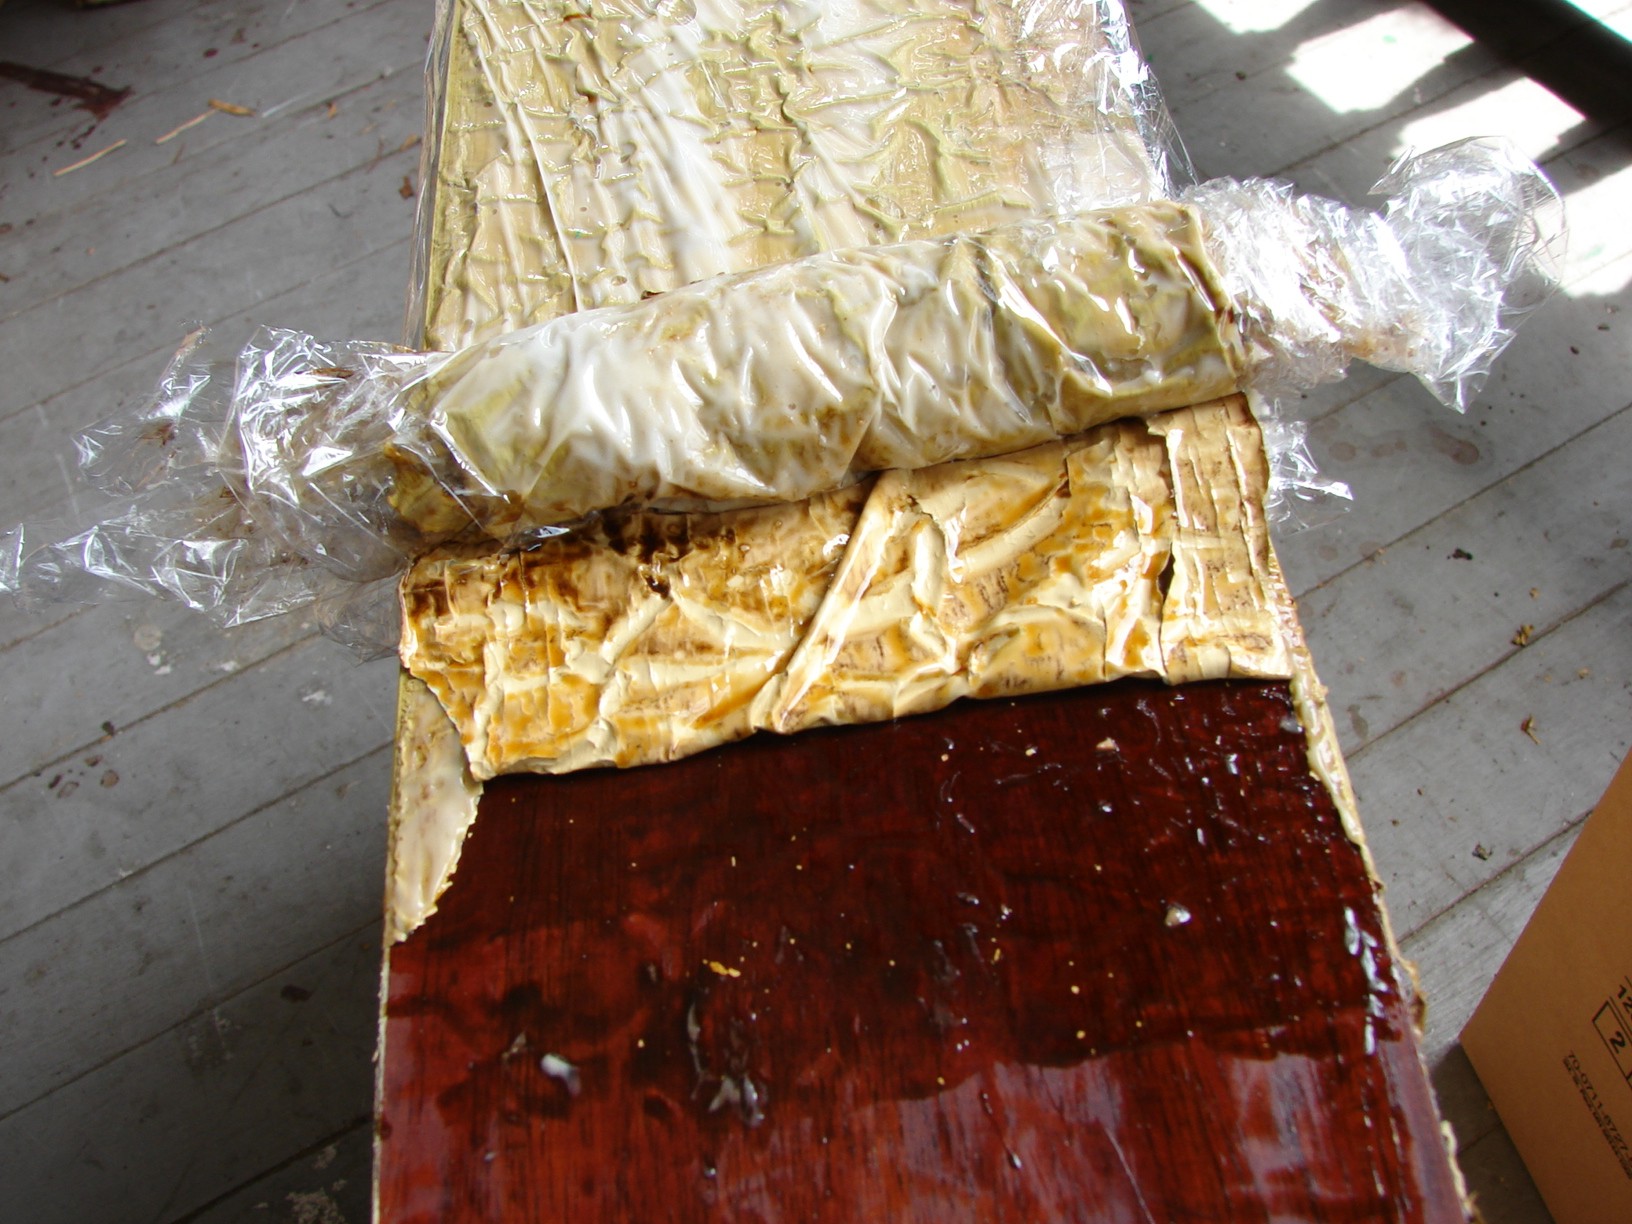
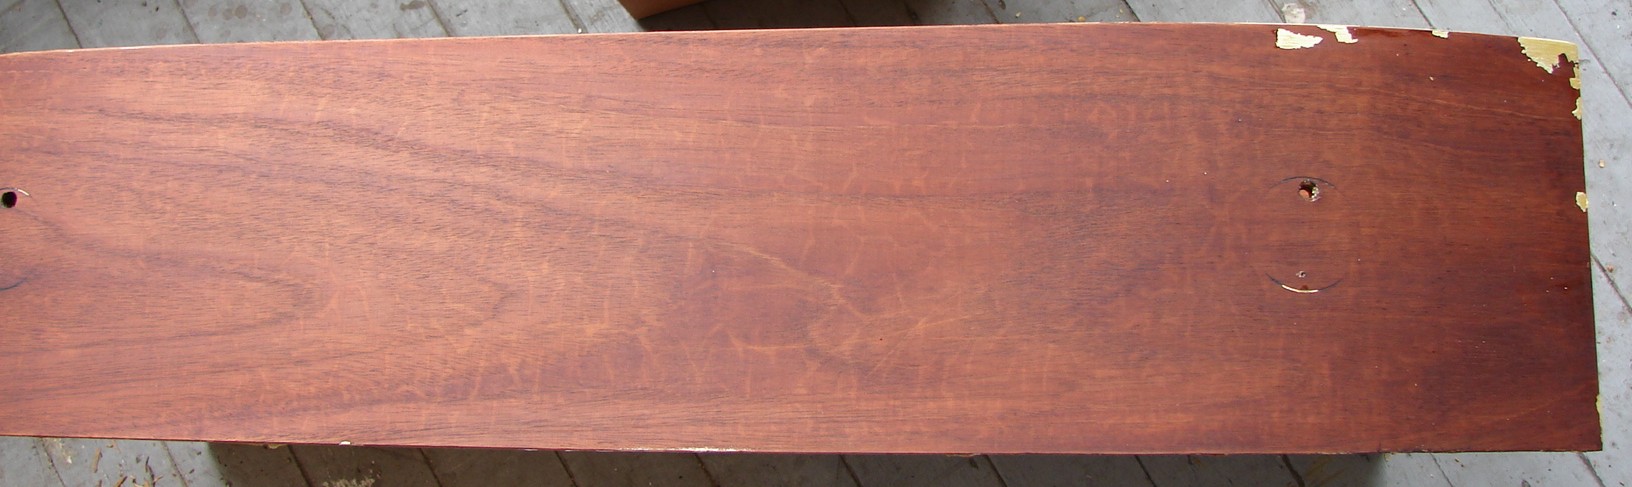
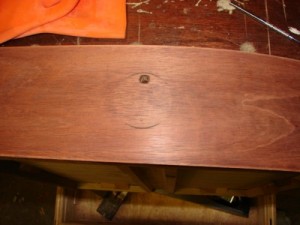
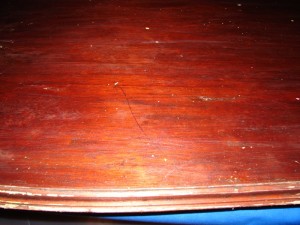
On August 25, I started peeling the wax paper back, and scraping the runny paint off. Remember, at the top of this page, when I talked about the gorgeousness of the mahogany bureau’s top when I stripped it as an experiment? Well. The Chest of Drawers revealed the same pleasures, and thanks to my having a camera nearby, here’s what it looked like.
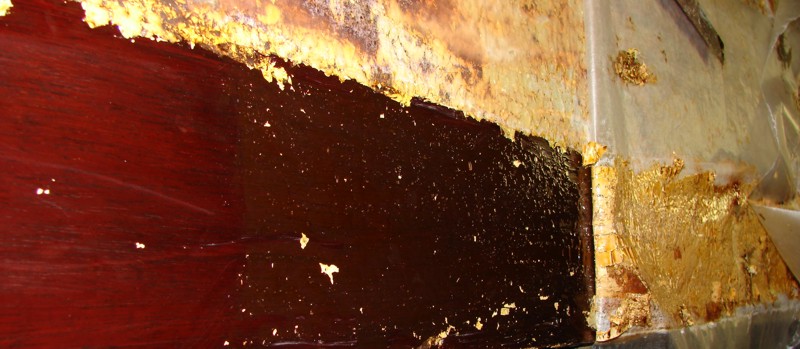 At far right is the wax paper, with the paint sticking to it. In the middle is the area I’ve just exposed, with some paint flecks and gummy finish-residue in need of a wiping-off. At left is the surface of the bureau’s top, wiped clean with a rag and alcohol.
So, after a few reapplications of stripper, some cleaning with alcohol, here are three views of the semi-completed top.
August 25: Some Repair Work is Needed
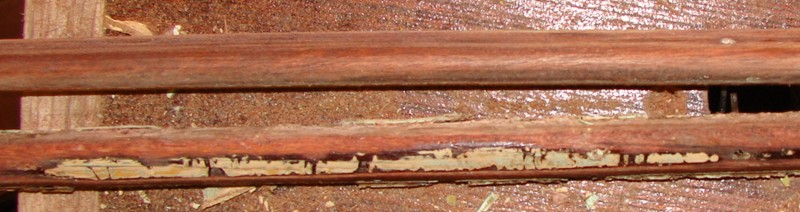
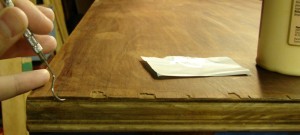 The top of the chest of drawers is not in perfect shape. Some of the veneer on the left rear corner has chipped away, and despite some glue work, there’s still a loose bit there. Have a look: I’ve stuck a dental pick into the loose veneer point. The first job was to get the veneer glued down. So I put some glue on a thin strip of paper, slid it into the gap, and clamped it shut while I went to work on another problem.
Fixing a Ding
 The photo at left– which has been enhanced a little– shows the second moist noticeable bit of damage on the top. It’s a deep rut, pretty much like the scar left by a ball-point pen on soft wood. Thankfully, it wasn’t a gouge, which would have penetrated the veneer. This was just a line where the wood fibers underneath had been crushed a little. I’d read about a fix for these dings in one of the woodworking magazines, and here was an opportunity to try it. The idea was that the wood fibers needed some water to expand back to their normal shape. So, I dribbled some water along the scar, rubbing my finger in to break up the beading. Then, I placed a paper towel on it, and applied a hot laundry iron for a short while. The idea was that the heat’d expand the water that had soaked into the ding. It actually worked. The line is still visible, as it’s also discolored, but it’s now smooth and flush with the rest of the top’s surface. I figure that the sanding I’ll be doing tomorrow will reduce that line a bit. But I can’t eliminate it entirely.
Wood Filler Time
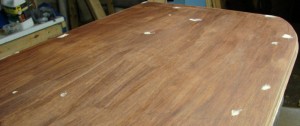 All the paint has been removed. I’ve done as much repair work as I can to restore the top, so the last job left is to patch the thing so it’s smooth, at least. So, in the photo at right, you’ll see that I applied dabs of wood filler (stainable wood filler, of course) to the small holes and gouges in the top. Most of them are extremely small, smaller than a match head. Perhaps one or two are bigger. But, I filled them in, and now I’ll just wait until the filler dries before sanding the whole thing nice and smooth and flush. But the patch job at the left rear is larger, of course. So, I filled those in.
 At left, you’ll see what I have to sand away. It can still look nice. But I’ll have to see how it looks stained. If it stains to a nice, light color, than I can sort of “fake” the wood grain. There’s several ways to do this. I could paint it in with darker stain and a fine brush. or, I could make fine cuts in the wood filler with an Xacto, and the stain would fill those cuts and remain dark. But, that will have to remain until tomorrow, I guess.
August 26. Sanding of the Top
Today, I sanded the top. I sanded the filler areas flush with 100-grit sandpaper. Then, after all was nice and even, I sanded the entire surface flush with 220-grit paper, and I followed that with a sanding using a nice, brand new 320-grit sanding sponge.
So the top is pretty durned smooth right now, and ready for staining. I don’t have any photos, but I can report that the attempt to pre-stain the filler’d areas to make them less obvious didn’t go too well. The ‘stainable filler’ wasn’t as permeable to a stain as I’d hoped, gel stain or water-based finish. So there are a few spots which look a little lighter than the rest of the top. Once again, I invoke the “charm of “character,” and push forward to get this project done.
 Again, the gel stain dries very quickly, and if you don’t wipe off the excess you can get clumps here and there. I had this problem with the sides, but they didn’t show up very much. But the top… well, this is visible, flat, and practically at eye level. I found that one way to even the stain out was to wipe it on, and wipe off the excesses not with a cloth, but a cloth soaked in mineral spirits. These are usually used to remove gel stains, but I found that, after the stain started to dry, a small amount of mineral spirits softened it and made it easier to spread around. The lighting in the shop made a good photo damn near impossible, so the photo above has been enhanced a little. But, I’m letting it dry tonight, and tomorrow I’ll start lathering on the polyurethane.
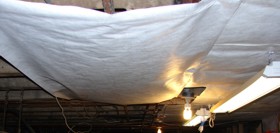 Oh, and there’s a little improvisation I’d like to pass along. As you may have noticed in these photos, my basement workshop has a fair number of exposed pipes running under the joists down the middle of the ceiling. This is one reason why my basement isn’t really “finished” with ceiling tiles: I’d greatly prefer being able to fix my plumbing without the bother of working past a framework. However, since I don’t have a subflooring in my house (it’s an old house), dust and debris filters through the cracks and drops right down onto any refinishing projects I have. So, I put up a temporary ceiling: a nice big sheet of Tyvek, which I staplegunned to the joists. Keeps the dust off the project, and it’s easily removable if disaster strikes.
Part 4
August 27-28: Finally, Finishing the Top
This is the penultimate task: applying a couple of nice, smooth coats of polyurethane to the top. One of the most frustrating parts of this job is that the actual application of a layer takes maybe fifteen minutes: most of the actual process is in waiting 24 hours for the layer to dry before you can move on to the next task.
August 29-September 2nd. Disaster really DID strike.
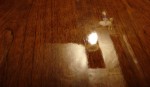
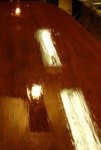 I have no idea what went wrong, but it did. Somewhere between the applications of the second and third layers of polyurethane, I found that the surface just wasn’t as smooth as I’d wanted it to be. The photo at left, exploiting the reflections of my shop’s overhead lights, shows what I’m talking about. I have no real idea what went wrong, but it seems as though the polyurethane I was using may have started to gel in the can, so it didn’t spread as evenly as it should, and I should have diluted it a bit with paint thinner as well. Sanding the stuff down just made it worse. I tried sanding with fine grit, then with coarser grit to break the surface down more efficiently… and then I wound up with sandpaper-created gouges in the finish… I gave up. This finish was finished, I decided. There was nothing for it but taking the whole thing off and starting over.
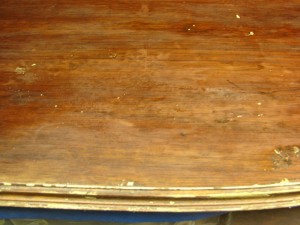
 I removed the polyurethane with paint stripper: first Safest Stripper with wax paper covering, followed with Methylene Chloride. This did the trick, as usual. But I took my time with this because the disaster was, well, pretty dispiriting. I’d screwed up, and there’d been a good chance that the top could have been ruined. So the re-stripping of the top went very slowly. So, here we are again. A nice, clean top, only mildly discolored, ready for a nice fresh application of stain and finish. And about a week and a half’s worth of work has been evaporated. The veneer’s probably 0.01″ thinner, too. I even removed the bits of wood filler in the repair areas, because taking off the crummy finish required it. The filler didn’t stain properly, anyway.
I’m thinking of two possibilities for those areas. The first is to order some nice thick brown wax. The second is to mix the gel stain in with the filler and match the color before filling the damage. But as the the polyurethane… well, this time, I’m not using the thick stuff I brushed on before. I’m using wipe-on poly for the first coat, at least; and if I have to use the thick stuff, I’m thinning it severely.
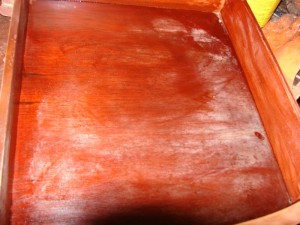
September 4-5
 At right, you can see what the first coat of wipe-on polyurethane loks like… sorta. The photo looks nice, but up close and in person, a single coat of wipe-on polyurethane doesn’t look like much. It looks more like a very, very light glaze that may or may not be on the actual wood. It’s nice to wipe the stuff on, because it looks great when it’s wet, and you can apply it without worrying about brush strokes or bubbling in the finish. And because the wipe-on poly takes only two hours to dry, I applied three coats during Labor Day.
 The next day, I diluted the regular glossy poly severely, and applied it with a nice, wide foam brush. It seemed to go OK. Here’s what I got: The day after that, I sanded that layer down with 400-grit sandpaper; there was some resistance, and somehow, the sanding left some light scratches. Another application of wipe-on didn’t cover that entirely…
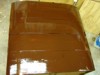
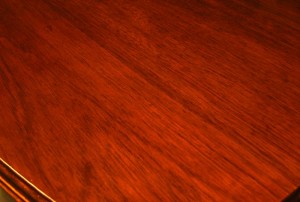
September 8-9. Completion.
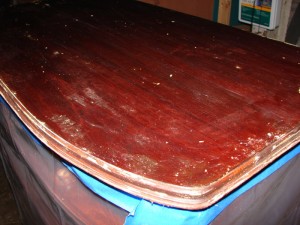
 … so I put on a last layer of the regular-but-diluted polyurethane. Come today, after a nice 24 hours of drying and crystallizing and getting nice’n’hard, this was the result. Notice how clear the reflections are.
I’ve moved the thing to my room (which, as you can tell from the background in the photo, also needs a lot of work), and apart from needing two screws for the drawer hardware, this project is done. Have another look at the progress.
-
- The Original Piece
-
- The Finished Product
-
- The Finished Product, without flash